Connect with us

FOOD AND DRINK

Easy Terry’s Chocolate Orange Slice

Published

on

Love Terry’s Chocolate Orange? You’ll love this Easy Terry’s Chocolate Orange Slice – no bake and just a few minutes to make!

This Easy Terry’s Chocolate Orange Slice is here to be your superhero when you need a last minute, super chocolatey treat.

These bars are a perfect treat for any Terry’s Chocolate Orange fan! Not only is the base mixture a cross between a chocolatey cookie dough and fudge, but it’s spiked with orange liqueur and topped with loads of Terry’s Chocolate Orange segments. 😍

My No Bake slice recipes are quickly becoming my FAVOURITE easy bake no bake! When I had the idea to make a REALLY Malteser-y chocolate No Bake slice, I had no idea whether they would work out nicely, so I was SO happy when they turned out to be one of the most yummy things I’ve ever eaten.

Let me tell you how embarrassingly easy this Easy Terry’s Chocolate Orange Slice is to make… we start with soft butter and sugar – you can mix them by hand or in a mixer. Add a can of condensed milk, plus melted plain chocolate, orange liquer (or skip if you like!) and flour.

Press the gorgeous chocolatey mixture into a pan and smooth with the back of a spoon, then top with Terry’s Chocolate Orange segments  – I used some orange pretzel M&Ms too — holy hell those things are good.


What You’ll Need to Make This Easy Terry’s Chocolate Orange Slice

You’ll need butter, sugar, plain chocolate, orange liqueur, a can of condensed milk, flour and salt.

I also used some orange M&Ms and some tiny gold star sprinkles. Mine were from Asda, but you can also get them online.

Continue Reading
Click to comment

Leave a Reply

Your email address will not be published. Required fields are marked *

FOOD AND DRINK

Baked Chicken leg Quarters

Published

on

By

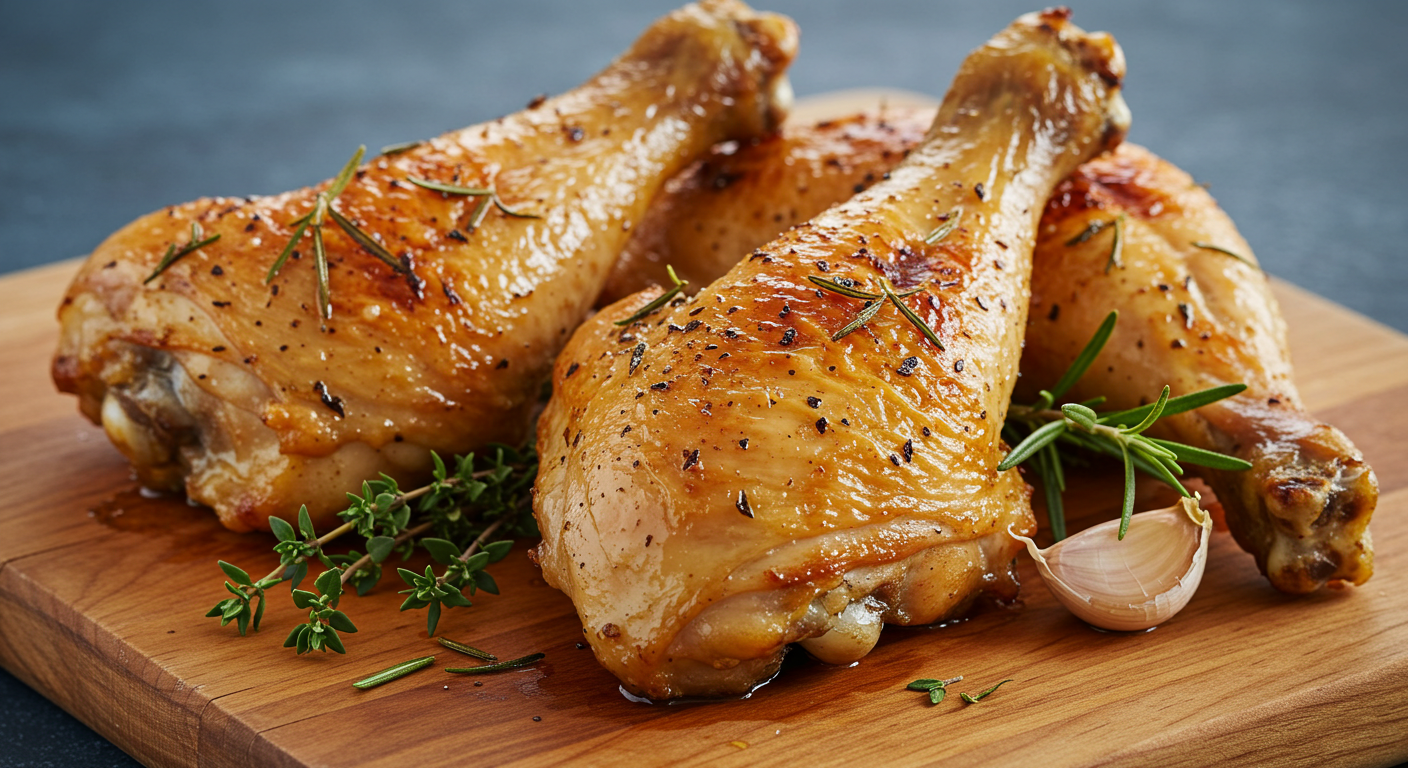
Baked Chicken leg Quarters

Baked Chicken leg quarters are a go-to dinner option for many households. They’re inexpensive, incredibly flavorful, and—when prepared just right—yield moist, tender meat with crispy, golden skin. But getting that perfect texture and taste can feel like a daunting task.

If you’ve found yourself googling “How to bake chicken leg quarters perfectly,” or struggling between recipes that all seem too complicated, this guide is for you. Here, we’ll walk you through every step of preparing irresistible baked chicken leg quarters, highlight essential tips, and explore variations to suit different tastes.

Whether it’s your first try or you’re a seasoned home chef, by the end of this article, you’ll have all the tools you need to impress with this versatile dish.

Why Chicken Leg Quarters?

Chicken leg quarters are a combination of both the thigh and the drumstick, making them a hearty, satisfying option for dinner. But there are many other reasons to choose these cuts:

  • Affordable and Economical:

When compared to chicken breasts, leg quarters are notably less expensive. This makes them ideal for feeding a family or preparing multiple meals on a budget.

  • Rich, Flavorful Meat:

Thanks to the dark meat, they naturally have a richer, more robust taste. Additionally, the skin and fat content help retain moisture while baking.

  • Versatility:

Chicken leg quarters adapt beautifully to an array of marinades, spice rubs, and side dishes, making them suited to various cuisines.

Now that you know why these cuts deserve a permanent spot in your meal rotations, here’s how to prepare them.

Preparing Your Chicken Leg Quarters

Step 1: Choose Quality Ingredients

The base of any great dish is quality ingredients. Look for fresh (or properly thawed) chicken leg quarters. Opt for organic or free-range chicken if possible, as they tend to have a slightly better flavor and texture.

Step 2: Dry the Skin for Crispiness

One of the secrets to achieving perfectly crispy skin is to start with completely dry chicken. After rinsing the chicken leg quarters under cold water, pat them thoroughly dry using paper towels.

For an even crispier finish, you can leave the chicken uncovered in the refrigerator for 30 minutes or so beforehand. This air-drying step helps wick away moisture from the surface of the skin.

Step 3: Season Generously

Good seasoning is key to building flavor. Start with salt and pepper as your base. Afterward, consider any of these popular seasoning blends to customize your chicken:

  • Classic Garlic and Herb:

Combine garlic powder, onion powder, dried rosemary, thyme, and a touch of paprika for color.

  • Lemon Pepper:

Add freshly grated lemon zest to black pepper and salt for a citrusy twist.

  • Smoky Barbecue:

Use smoked paprika, chili powder, brown sugar, and a hint of cayenne for some heat.

Marinate your chicken leg quarters for at least 20–30 minutes for maximum flavor—though letting them sit overnight in the refrigerator yields the best results.

How to Bake Chicken Leg Quarters

Here’s the tried-and-true method for baking chicken leg quarters that strikes a balance between juicy meat and perfectly crispy skin.

Step 1: Preheat the Oven

Preheat your oven to 400°F (200°C). This temperature is ideal for achieving a balance between crisping the skin and cooking the meat thoroughly.

Step 2: Prep Your Baking Dish

Line a baking dish or sheet with parchment paper or foil (for easier cleanup). Place an oven-safe wire rack on top of your tray to elevate the chicken. This allows air to circulate around the chicken while baking, resulting in a crispier finish.

Step 3: Arrange and Brush with Oil

Place your seasoned chicken leg quarters skin-side up on the wire rack. Lightly brush or spray the chicken with olive oil to help the skin crisp up and lock in the seasoning during baking.

Step 4: Bake and Monitor

Bake your chicken for roughly 35–45 minutes. Use a meat thermometer to check that the internal temperature reaches a safe 165°F (74°C). For extra crispy skin, finish the chicken under the broiler for 2–3 minutes, keeping a close eye on it to prevent burning.

Tips and Tricks for Perfect Results

  • Don’t Overcrowd:

Ensure there’s enough space around each piece of chicken to allow for even heat circulation.

  • Use a Thermometer:

A meat thermometer is your best friend. It ensures you don’t undercook or overcook your chicken.

  • Rest the Chicken:

Allow the chicken to rest for at least 5–10 minutes after baking. This step helps redistribute the juices, keeping the meat moist.

Flavor Variations to Try

The beauty of baked chicken leg quarters lies in their ability to pair well with a range of flavors. Here are some ideas:

  • Asian-Inspired:

Marinate your chicken in soy sauce, ginger, garlic, and a drizzle of honey or sesame oil.

  • Mediterranean:

Use olive oil, oregano, lemon, and garlic for a bright, fresh flavor profile.

  • Spicy Cajun:

Coat your chicken in Cajun seasoning and add a dash of hot sauce for a fiery kick.

What to Serve with Baked Chicken Leg Quarters

No meal is complete without the perfect sides to complement your baked chicken. Some popular pairings include:

  • Mashed potatoes or roasted sweet potatoes
  • Steamed green beans or a crisp salad
  • Buttery dinner rolls or crusty artisan bread
  • Cornbread or polenta for a Southern flair

For an all-in-one meal, add chopped vegetables (like carrots, potatoes, or zucchini) to your baking tray and roast them alongside the chicken.

Why Baked Chicken Leg Quarters Should Be a Staple in Your Menu

Chicken leg quarters aren’t just easy to bake—they’re also incredibly versatile. From a cozy family meal to a sophisticated dinner with guests, these flavorful cuts fit a variety of occasions.

By mastering this simple dish, you open up endless opportunities to experiment with flavors, sides, and presentation while still enjoying a hearty, nutritious, cost-effective option.

If you’ve never tried baking chicken leg quarters this way, now’s the time to elevate your cooking game.

Continue Reading

FOOD AND DRINK

Easy Orange Chocolate Chip Muffins

Published

on

By

Imagine waking up to the aroma of freshly baked orange chocolate chip muffins, a recipe that’s become a staple in my kitchen and a favorite among family and friends.

It’s the perfect balance of zesty orange and indulgent chocolate, a treat that’s sure to brighten up your breakfast table or add a special touch to your afternoon tea.


It’s a delightful twist on the classic chocolate chip muffin, infused with the fresh, citrusy notes of orange. You’re in for a mouthwatering treat that’s not only delicious but also easy to make. Let’s get started and turn your kitchen into the sweetest spot in the house.

Ingredients

All-Purpose Flour: The cornerstone of our muffin recipe, imparting the essential structure for a perfect texture. Accurate measurement is crucial for achieving optimal results.

Baking Powder: A culinary enchantment, functioning as a leavening agent to elevate our muffins, rendering them irresistibly light and fluffy.

Salt: A subtle touch of salt works wonders, harmonizing and intensifying the myriad flavors within the muffins.

Egg: The unifying force, binding together all the ingredients and contributing to the delightful texture of our muffins.

Granulated Sugar: Sweetening the deal just right, striking a delicate balance to ensure a symphony of flavors in every bite.

Milk: Infusing moisture into our muffins, bestowing upon them a soft and delectable quality.

Unsalted Butter: Introducing richness and a nuanced flavor profile; melting it guarantees seamless integration into the batter.

Oranges: The true heroes of this culinary masterpiece! Fresh oranges, both juiced and chopped, bring a burst of citrusy delight to every mouthful.

Semi-Sweet Chocolate Chips: These delectable morsels create pockets of chocolatey bliss, harmonizing effortlessly with the vibrant orange notes, resulting in a truly indulgent treat.

Instructions

Getting ready to bake your orange chocolate chip muffins involves some essential prep work before you immerse. Start by preheating your oven to a precise 380°F to ensure it’s at the perfect temperature when your muffin batter is ready to go. It’s crucial that the heat is consistent for the muffins to rise and bake evenly.


Let’s tackle the dry ingredients. You’ll need to sift the all-purpose flour, baking powder, and salt into a bowl. Sifting not only removes any lumps but also aerates your flour, resulting in lighter, fluffier muffins. Once sifted, set this bowl aside.

Next up, the fresh orange elements that give these muffins their zesty kick. Take one orange and squeeze out the juice, making sure to reserve it. You’ll use this both for the flavor and the moisture it adds. For some texture and an extra punch of citrus, peel another orange and slice it into small, flavorful chunks.


In a separate container, combine the wet ingredients: an egg for binding, sugar for sweetness, milk, the previously prepared orange pieces, reserved juice, and melted butter for richness. Merge these ingredients using a hand mixer or whisk until they form a uniform, smooth mixture.


The moment has arrived to unite the wet and dry mixtures. Pour the liquid blend over the dry ingredients, and mix just enough to make a moist batter. It’s imperative to mix minimally to prevent overworking the flour, which can make your muffins tough.


Finally, fold in the semi-sweet chocolate chips. Do this gently to avoid deflating the batter. This step infuses the muffins with melty pockets of chocolate.


When you’re ready to bake, spoon the batter into silicone or paper-lined muffin pans. Ensure they are filled evenly for uniform baking. Pop them into your preheated oven and let them bake for 25 minutes or until they pass the toothpick test; it should come out clean when inserted into the center of a muffin.


Remember, your kitchen will soon be filled with the aroma of zesty orange and warm chocolate, a sign your muffins are nearly ready to enjoy. Happy baking.


Tips for Success


Crafting the perfect batch of orange chocolate chip muffins isn’t just about following a recipe—there are nuances that can take your baking from good to great. Paying attention to small but significant steps will ensure a delightful outcome each time you bake.

Use Fresh Oranges

The secret to infusing your muffins with an unmistakable citrus zing lies in the quality of the oranges. Fresh oranges provide not just the juice but also the zest, which is packed with essential oils for that punch of flavor. These fresh components mix harmoniously with the batter and deliver a refreshing taste that pre-packaged orange products simply can’t match. Here’s what you need to do:

  • Zest the orange before juicing it, as it’s easier to handle.
  • Only zest the colored part of the peel, as the white pith beneath can be bitter.
  • Use a fine grater for a light and airy zest.

Use High-Quality Chocolate Chips

When it comes to chocolate chips, quality matters. Opt for semi-sweet or bittersweet chocolate chips with a high cocoa content for a rich, complex flavor that compliments the fruity undertones of the orange. High-quality chocolate melts beautifully, distributing evenly through the muffins and creating pockets of gooey goodness. Avoid chocolate with added fillers or artificial flavors to ensure that the muffins taste divine. Here’s what to look for:

  • Chocolate with cocoa butter listed as one of the first ingredients.
  • Chips that contain at least 50% to 70% cocoa solids.

Do Not Overmix the Batter

The texture of your muffins is just as important as the taste. Overmixing the batter develops the gluten in the flour excessively, leading to dense and rubbery muffins. To achieve a tender crumb, mix the batter until the ingredients are just combined—no longer. Here are some tips:

  • Mix dry and wet ingredients separately before combining.
  • Use a folding technique with a spatula for less agitation.
  • Stop mixing once there are no large flour pockets—a few lumps are okay.

Remember that baking is both an art and a science. By incorporating these tips with precise measurements and careful attention to each step of your recipe, you’re on your way to mouthwatering orange chocolate chip muffins.

Variations


Swap out the chocolate chips for white chocolate or dark chocolate pieces to suit your taste. Feeling adventurous? Add a dash of cinnamon or nutmeg for a warm twist.

Whatever you choose, you’re now equipped to whip up a batch of orange chocolate chip muffins that’ll impress anyone. So preheat that oven, and let the sweet citrus aroma fill your kitchen. Happy baking.

Continue Reading

FOOD AND DRINK

Delicious and Easy Honey Bun Cake

Published

on

By

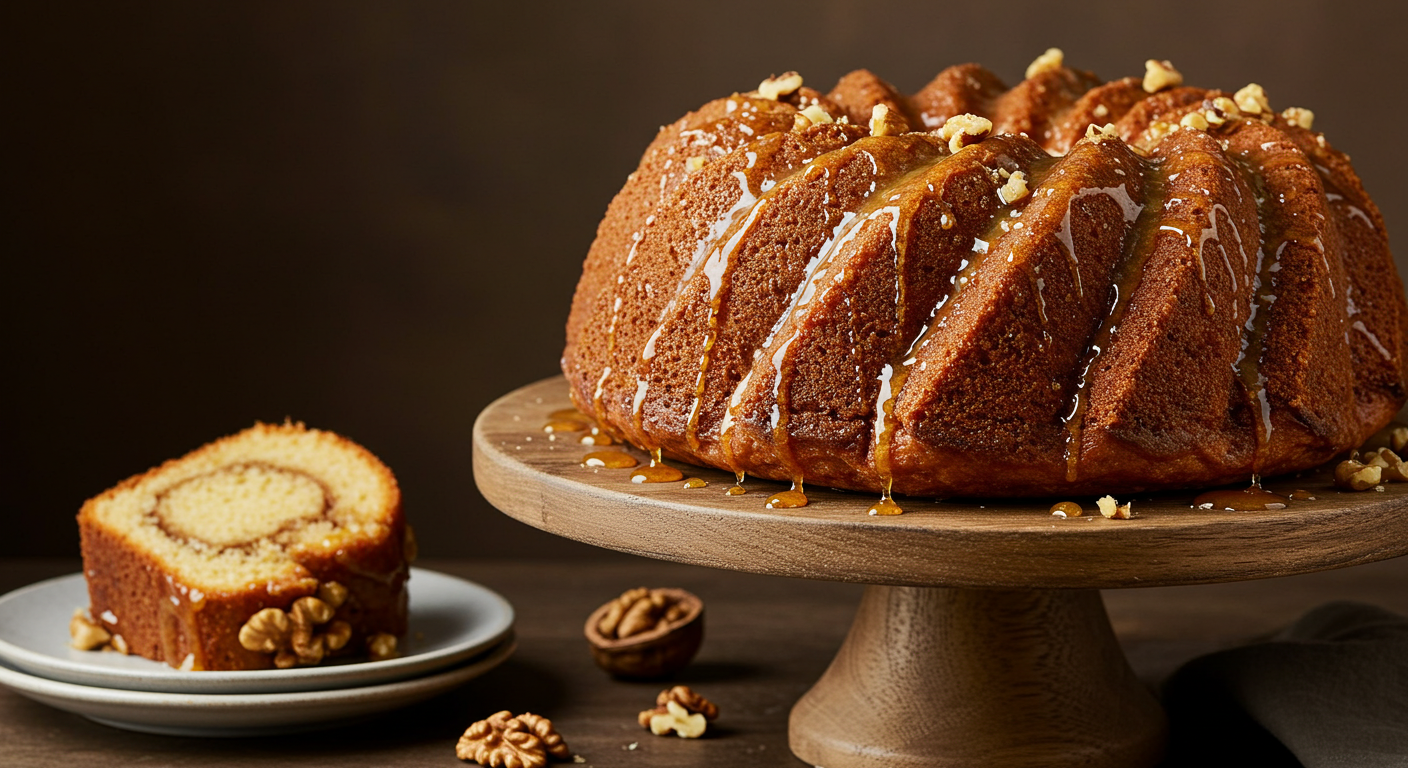
Looking to satisfy your sweet tooth with a delectable treat? Look no further than the irresistible honey bun cake. This mouthwatering dessert is a delightful combination of moist cake and gooey cinnamon swirls, topped off with a sweet glaze that will have you coming back for seconds.

I’ll share with you a tried and true honey bun cake recipe that is sure to impress your friends and family. Get ready to indulge in a slice of heaven as we guide you through the steps to create this heavenly dessert. So, grab your apron and let’s get baking.

What You’ll Love About This Recipe

When it comes to the honey bun cake recipe, there are several aspects that will make you fall in love with it. Let’s take a closer look at what makes this dessert a real winner:

1. The Perfect Balance of Flavors

The combination of sweet cake mix and tangy cream cheese creates a harmonious balance of flavors in every bite. The sweetness of the cake mix perfectly complements the tanginess of the cream cheese, resulting in an irresistible flavor palette. This delicate balance is one of the reasons why the honey bun cake stands out among other desserts.

2. A Joyful Baking Experience

Even though its intricate flavors, this recipe is surprisingly easy to make. You don’t need to be an experienced baker to whip up a delicious honey bun cake. The straightforward instructions and simple ingredients make it a joy to bake, even for beginners. So whether you’re a seasoned baker or just starting out, you’ll find this recipe enjoyable and rewarding.

3. Versatility for Any Occasion

Looking for a dessert that fits seamlessly into any menu or celebration? Look no further than the honey bun cake. Its versatility makes it ideal for any occasion, whether it’s a family gathering, a birthday party, or a casual get-together. The rich flavors and delightful textures of this cake can elevate any event and leave your guests wanting more.

4. A Delightful Sensory Experience

What sets the honey bun cake apart from other desserts is its amazing texture. The moist and rich cake, combined with the crunchy layer of brown sugar and cinnamon, promises a delightful sensory experience.

With every bite, you’ll enjoy the heavenly combination of soft, moist cake and gooey cinnamon swirls. It’s a delectable treat that will satisfy your taste buds and leave you craving for more.

To conclude, there are many reasons why you’ll love the honey bun cake recipe. Its perfect balance of flavors, ease of preparation, versatility for any occasion, and delightful sensory experience all contribute to making it a truly exceptional dessert.

Don’t wait any longer – grab your apron and get ready to indulge in a slice of heaven with this tried and true recipe.

Ingredients


To create a mouthwatering honey bun cake, you’ll need a few simple ingredients that are easily available at your local grocery store. Let’s take a look at what you’ll need:

For the Cake:

  • 8 ounces of cream cheese, softened
  • 4 large eggs
  • 2/3 cup of oil
  • 15.25 ounces of vanilla or yellow cake mix
  • 3/4 cup of packed brown sugar
  • 2 teaspoons of cinnamon

For the Glaze:

  • 2 1/2 cups of powdered sugar
  • 1/2 cup of heavy cream
  • 2 teaspoons of vanilla extract

These ingredients come together to create a perfect balance of flavors and textures that make the honey bun cake truly special. The cream cheese adds a tangy note to the sweet cake mix, while the brown sugar and cinnamon create a delightful layer of crunchiness on top.

The cream cheese, eggs, and oil provide moisture to the cake, ensuring a soft and moist texture. The vanilla or yellow cake mix serves as the base for the cake, providing a classic and versatile flavor that everyone will love.

Once the cake is baked to perfection, the glaze takes it to a whole new level. The combination of powdered sugar, heavy cream, and vanilla extract results in a rich and creamy glaze that adds a decadent touch to the cake. It perfectly complements the flavors of the cake while adding an extra layer of sweetness.

Now that you have all the ingredients for a homemade honey bun cake, it’s time to roll up your sleeves and get baking. Follow the simple instructions and prepare yourself for a delightful sensory experience that will leave you craving for more.

No need to worry about complex or hard-to-find ingredients. With just a few simple steps, you’ll be able to create a delicious honey bun cake that will impress your friends and family.

Instructions


To make a delicious honey bun cake, follow these simple steps:

  1. Preheat the oven to 350°F and grease a baking dish.
  2. In a mixer, beat the cream cheese until smooth. This will ensure a creamy texture in the cake. 3. Add the oil and eggs to the mixer and continue beating until the mixture is smooth. The oil will contribute to the moistness of the cake, while the eggs will help bind the ingredients together.
  3. Gradually add the cake mix to the mixer and mix until fully incorporated. The batter will be thick, but don’t worry, this will result in a rich and satisfying cake.
  4. In a small bowl, mix together the brown sugar and cinnamon. This combination will add a flavorful and crunchy layer to the top of the cake.
  5. Pour half of the cake batter into the prepared baking dish. 7. Sprinkle the brown sugar and cinnamon mixture evenly over the entire top of the batter.
  6. Add dollops of the remaining batter and smooth it out as much as possible. This will create a marbled effect, adding visual appeal to the cake.
  7. Bake the cake in the preheated oven for 35-40 minutes or until a toothpick inserted into the center comes out clean. This is an important step to ensure that the cake is fully baked and ready to be enjoyed.
  8. Allow the cake to cool to room temperature before moving on to the next step. This will ensure that the glaze sets properly.
  9. To make the glaze, simply pour all the glaze ingredients into a bowl and mix until well combined. The powdered sugar, heavy cream, and vanilla extract will create a rich and creamy glaze that perfectly complements the flavors of the cake.
  10. Pour the glaze evenly over the cooled cake, allowing it to set. This will add a final touch of sweetness and moisture to the cake.
  11. Finally, slice the cake, serve, and enjoy the delightful sensory experience of baking and indulging in a homemade honey bun cake.

Now that you know the step-by-step instructions, it’s time to gather the ingredients and start baking your own honey bun cake. Don’t forget to share this recipe with your friends and family—they’re sure to love it too.

Top Tips

When it comes to making a delicious honey bun cake, there are a few key tips that can greatly enhance your baking experience and ensure a perfect outcome. By following these tips, you’ll be able to create a cake that is moist, flavorful, and visually stunning. Here are some expert suggestions to help you along the way:

Soften the Cream Cheese

Before you begin, make sure your cream cheese is at room temperature. Softening the cream cheese allows for easy blending and ensures a smooth mixture. Cold or hard cream cheese can result in lumps in your cake batter, affecting the texture of the final product. So remember to take your cream cheese out of the refrigerator and let it sit for about 30 minutes before you start baking.

Don’t Overmix the Batter

Mixing your batter just until the ingredients are combined is crucial to achieve a light and tender cake. Overmixing the batter develops gluten in the flour, which can lead to a denser texture in the finished cake. To avoid a heavy cake, stop mixing as soon as the batter is smooth and well incorporated. This will result in a light and fluffy honey bun cake that is sure to impress.

Spread the Cinnamon-Sugar Evenly

To fully enjoy the spiced sweetness of the cinnamon-sugar mixture in every bite, it’s important to distribute it evenly over the batter. One helpful tip is to sprinkle the cinnamon-sugar mixture from a height. This will allow the mixture to disperse more evenly over the batter, ensuring that each slice of cake is filled with the perfect amount of warmth and flavor.

Cool Completely Before Glazing

Patience is key when it comes to cooling your honey bun cake before adding the glaze. To achieve that glossy, appetizing top, let your cake cool to room temperature before pouring the glaze over it. If the cake is still warm, the glaze will melt and soak in, resulting in a soggy rather than a glossy finish. So, resist the temptation to rush and allow your cake to cool completely for the best results.

Substitutions

When it comes to baking, it’s always good to know that you have options. Whether you have dietary restrictions or simply want to add a unique twist to your honey bun cake, here are some substitutions you can try:

1. Vanilla Cake Mix

While a traditional honey bun cake uses a vanilla cake mix, you can experiment with different flavors to customize your cake. For an extra warming flavor, try replacing the vanilla cake mix with a spice cake mix. This will add a delightful hint of cinnamon, nutmeg, and other warm spices to your cake, giving it a cozy and comforting taste.

2. Cream Cheese

If you’re lactose intolerant or prefer a dairy-free option, there are alternatives you can use in place of regular cream cheese. Opt for lactose-free cream cheese, which is available in most grocery stores, or try a non-dairy cream cheese alternative made from plants, such as almond or soy. These alternatives still provide a creamy texture and a tangy flavor that complements the sweetness of the cake.

3. Glaze

The glaze is an essential part of the honey bun cake, adding a sweet and glossy finish. If you need to avoid lactose, you can use a lactose-free milk alternative, such as almond milk or coconut milk, in place of regular milk in the glaze. This will give you the same creamy and smooth consistency without compromising on taste.

By making these substitutions, you can create a honey bun cake that suits your dietary needs and preferences, all while adding an extra touch of flavor. Whether you’re looking to make it dairy-free or add a unique twist, these substitutions will ensure that your cake is still delicious and enjoyable.

Next, we’ll move on to some additional tips to help you make the perfect honey bun cake.

Variations

Now that you have learned how to make a delicious honey bun cake, it’s time to get creative and try some variations. There are endless possibilities to make this cake your own and cater to your personal preferences or dietary restrictions.

You can experiment with different flavors of cake mix to add a unique twist to your honey bun cake. Whether it’s chocolate, vanilla, or even lemon, the choice is yours. Also, if you have dietary restrictions or are lactose intolerant, you can use lactose-free cream cheese or a lactose-free milk alternative in the glaze.

Don’t be afraid to get adventurous and add your favorite ingredients to the batter. Consider incorporating nuts, raisins, or even shredded coconut to give your cake an extra texture and flavor boost.

Remember, the key to a perfect honey bun cake is to follow the basic recipe and make it your own. Share this delightful recipe with your loved ones and enjoy the sweet and indulgent treat together. Happy baking.

Continue Reading

Trending